I've been busy creating recently so i thought i'd show you a small fraction of what i've been up to.
i made this flower, which you could attach to a bag, or use as a brooch or hair clip.
The fabric advent calendar was all sewn by hand and is quilted quite thick and plush.
i've made several bookmarks, all fairly similar, just embroidered in different colours etc.
i made the scripture cover from scratch with no pattern, again hand sewn. Im really proud of this one!

the cushion cover is envelope style, so there was no need for zips or buttons. the letters on the front were attached using bondaweb, and then sewn for decoration.
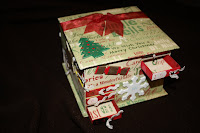
the paper advent was made out of matchboxes. so cute!!
finally, i made about 25 felt ornaments for my christmas tree, of
which these are just three. i went with red and white this year, so
they are all variations on this theme.
anyway, its been fun. if you want to see any more or know details about how to make anything in particular just leave a comment.
thanks for looking xx
ps. sorry this post is all over the place, blogger is not being co-operative today!

Posted by Jo!!!
Pin It